Monday, April 16, 2012

Trip report: Echo Lake, 2012-04-12/13

Thursday and Friday, 12-13 April, Kevin and Catherine decided to do a nice, fairly easy backpack to Echo Lake in the Catskill Mountains. (Cathy had spring break from school, and Kevin was much feeling the need to be incommunicado for a bit; things have been a bit crazy at work.) We decided to hike through from Meads Mountain above Woodstock to Plaat Clove (Platt, Platte—all three spellings are correct!). Mary Ann agreed to shuttle us down so that we could spot Kevin's truck at Plaat Clove and not have to make an in-and-out or a loop out of the hike. This drive is far beyond the call of marital duty, and Kevin praises Mary Ann to the heavens for it.
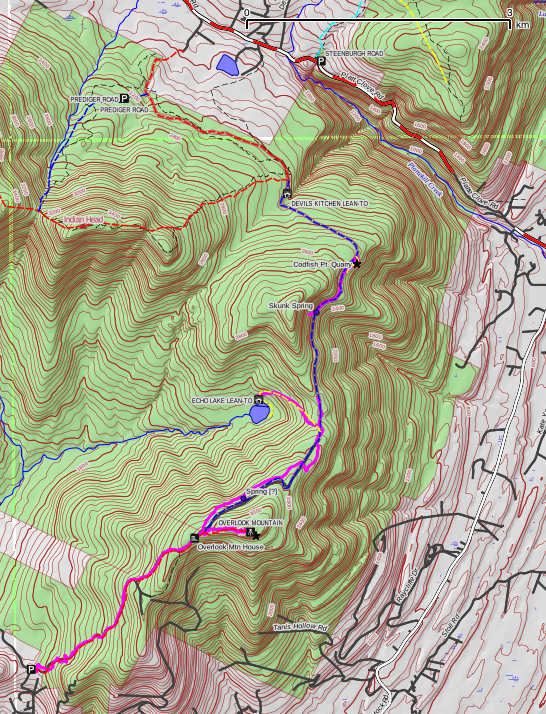
Trail map with GPS track overlay

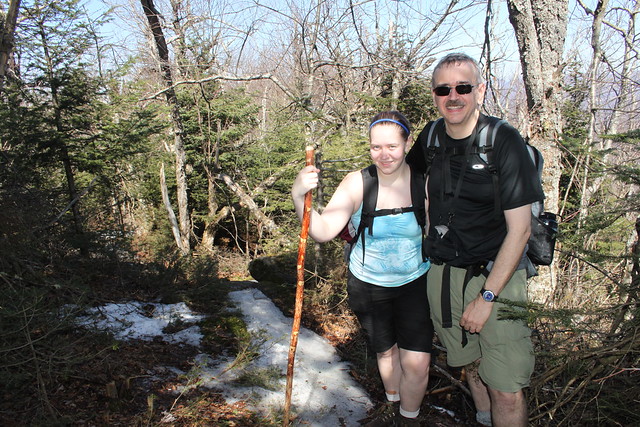
Since we're planning a leisurely hike, we don't try to get rolling at the crack of dawn, and what with the 2+ hours of driving (including the “road closed—pass at your own risk” drive down Platte Clove Road), we wind up arriving at the trailhead around 11:00. Mary Ann snaps a picture of the departing hikers, and we start up the road to the TV transmitter and the old Overlook Hotel.
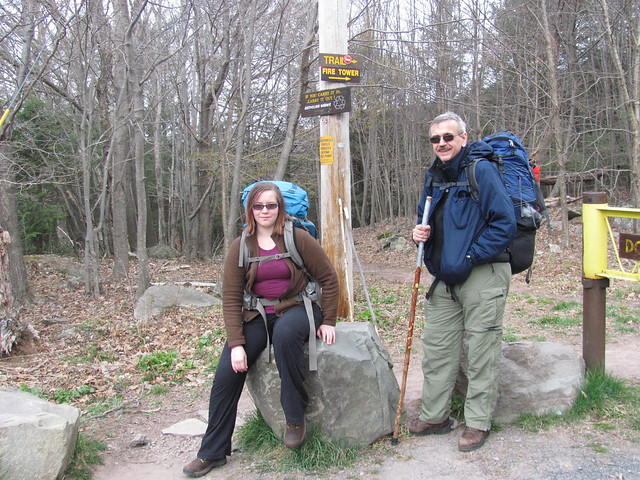
The hikers set off

The gravel road is maintained for vehicles, because occasionally a maintenance crew needs to visit the TV station (which is on State wild forest land, but with a grandfathered-in lease). But it's deceptively easy: it's gradual, but there is an unremitting 12% grade for the next 2.5 miles (4 km) to the top of Overlook Mountain. We set a sustainable pace, don't get burnt out, and fairly shortly arrive at the ruins of the Overlook Mountain House, an ill-starred grand hotel of the Catskills.
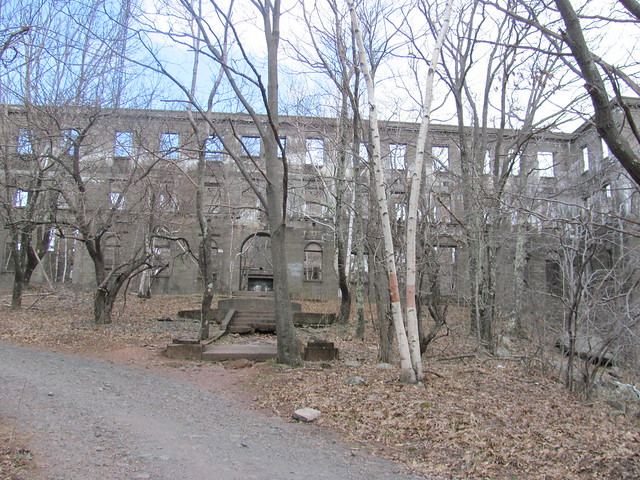
Approaching the Overlook Mountain House

Less well known than some of the other Catskill resorts, the Overlook Mountain House suffered considerable ill luck during its history. The first attempt to construct a guest house on the site was built in 1833, and changed hands in bankruptcy multiple times before the Civil War put an end to it. It was never successful financially. The first large hotel, which opened in 1871, was destroyed by fire in 1875. It was rebuilt in 1878, and continued sporadic operation until 1917, when it had its ultimate financial failure, and again fell victim to the flames in 1923. A third attempt to build a large hotel on the site commenced in 1928, but construction slowed during the Great Depression, and the hotel remained incomplete at the start of the Second World War. Much of the building survived—although the remaining construction materials had been pilfered—until the mid-1960s, when a final blaze brought down the never-finished building, leaving only the stone and concrete walls that stand to this day. The real reason that none of the attempts was successful appears to be the remoteness of the site. It is at a higher elevation than any of the other Catskill grand hotels, and had no ready rail access.[1]
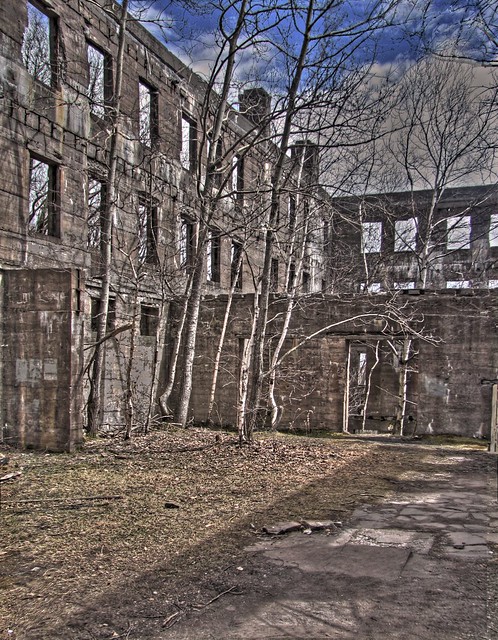
Ruins of the Overlook Mountain House

We spend considerable time sightseeing and taking pictures of the magnificent ruin. The whole site has a post-apocalyptic feel to it, as the abandoned masonry continues its slow decay in the Catskill winters. Even the signs warning of the building's condition after the fire are in a state of decay.
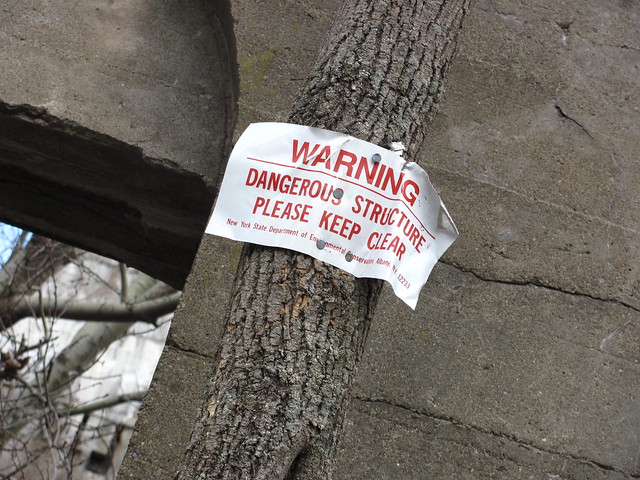
Dangerous Structure

The great fireplace of the hotel lobby now serves to hold the occasional campfire.
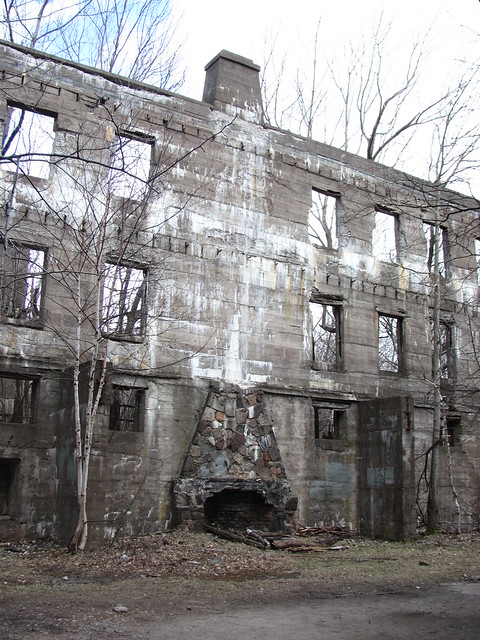
The main lobby

The dining room has stood abandoned long enough for trees to grow to maturity and themselves be toppled by storms.

Fallen trees

Twisted wreckage and half-burnt timbers fill the basement-level boiler room.
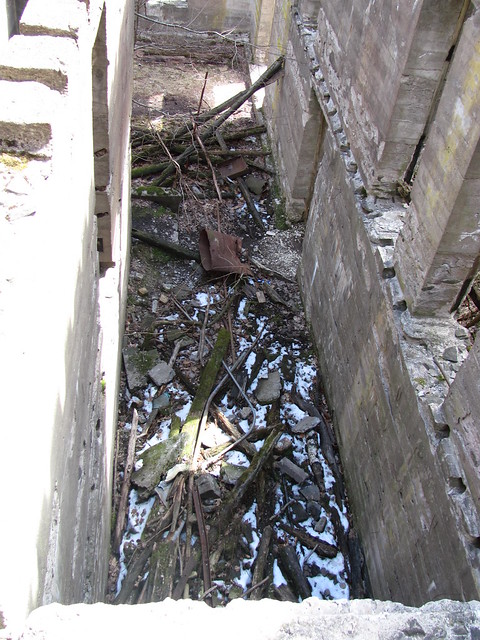
Boiler Room

A majestic stone staircase, now cracked and moss-covered, leads nowhere. The upper storeys have fallen.
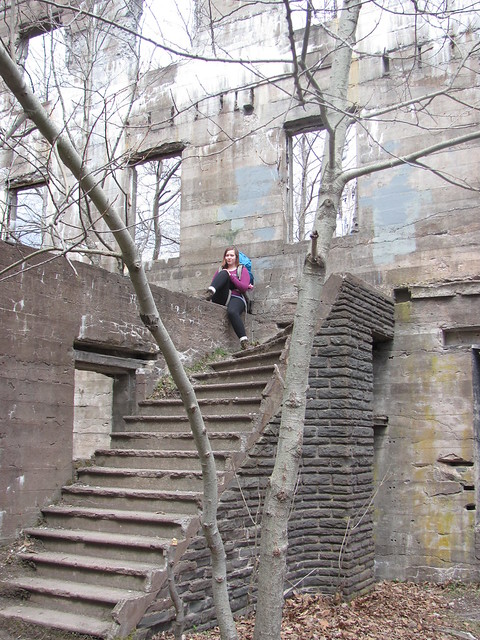
A grand staircase leads nowhere

The former vista from the front door is now grown to trees, but with the leaves down one can see how sweeping the view once was.
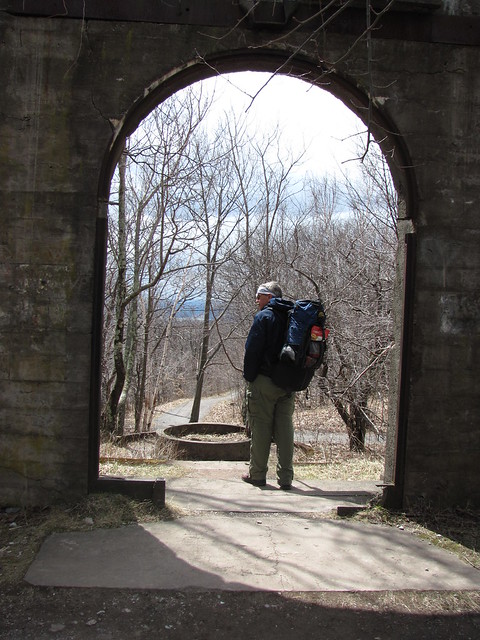
View from the front door

The squalls of sleet that continue to pelt us intermittently offer dramatic lighting for photographing the ruins.

Overlook Mountain House

The dark passage of a back door leads to the owners' mansion, also unfinished and burnt.
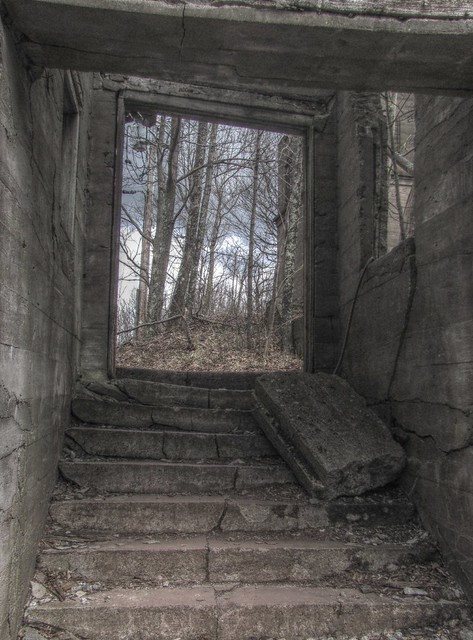
Overlook Mountain HouseOwner's mansion

Here, some of the windows retain their glazing, and are propped open as if some guests want to let in a little more air.
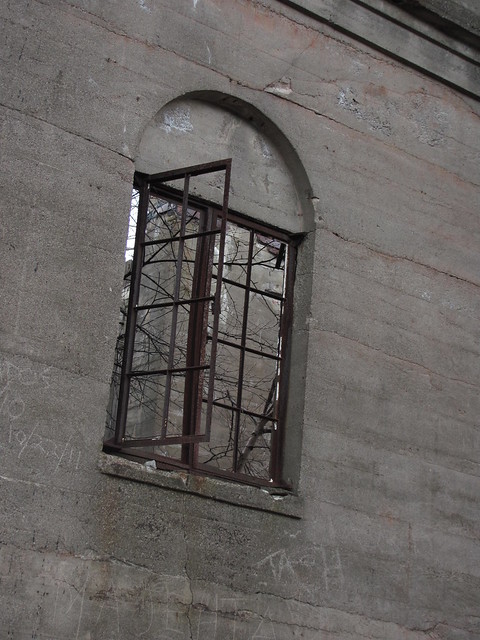
Window

And yet, inside, it is open to the weather.
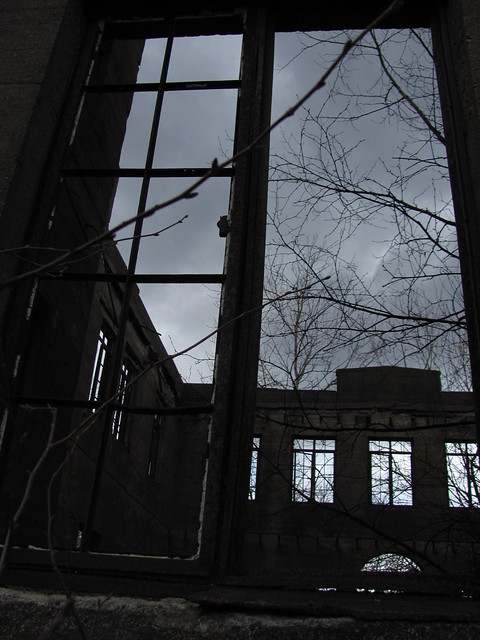
Looking into the owner's mansion

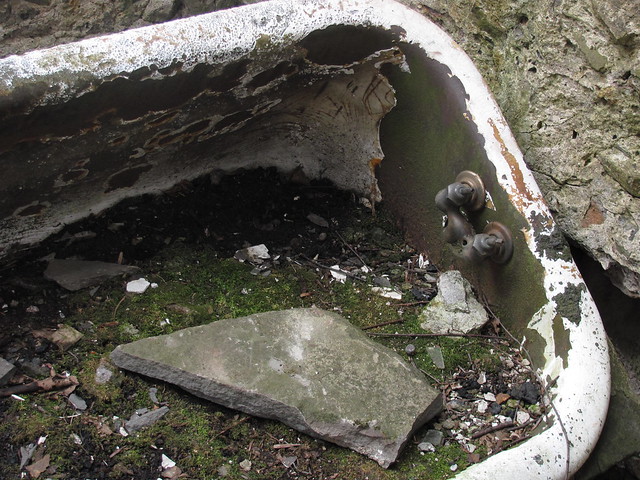
A debris-filled, claw-footed bathtub has fallen to a corner of the basement.
Fallen bathtub

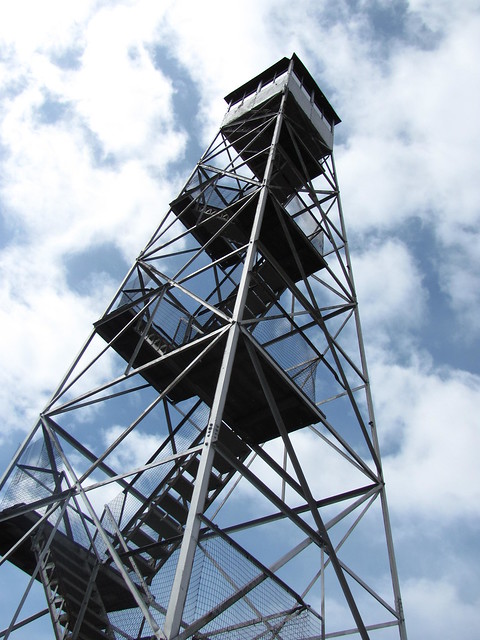
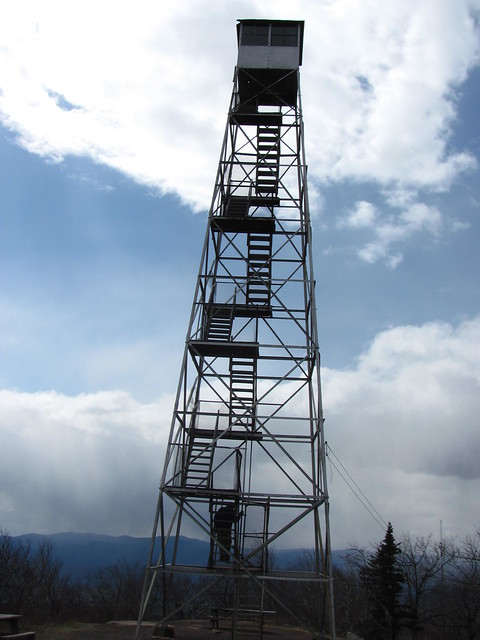
Eventually, we manage to tear ourselves away from surveying the ruins and continue on up to the Overlook Mountain summit, where a now-unused fire tower stands.
Overlook Mountain fire tower

We stow our packs on the porch of the fire warden's cabin, eat lunch (resisting the cuteness of a pair of Springer spaniels that are trying to cadge a handout), and explore the mountaintop unburdened. A few young balsam firs, normally present only at higher elevations, surround the cabin.

Fire warden's cabin

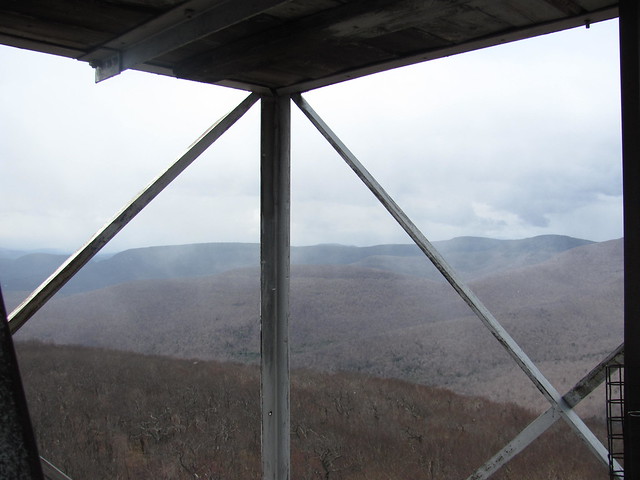
From the tower, we can see the squalls dropping shafts of sleet into the glacial cirque that will be our destination for the evening.
IMG_2123

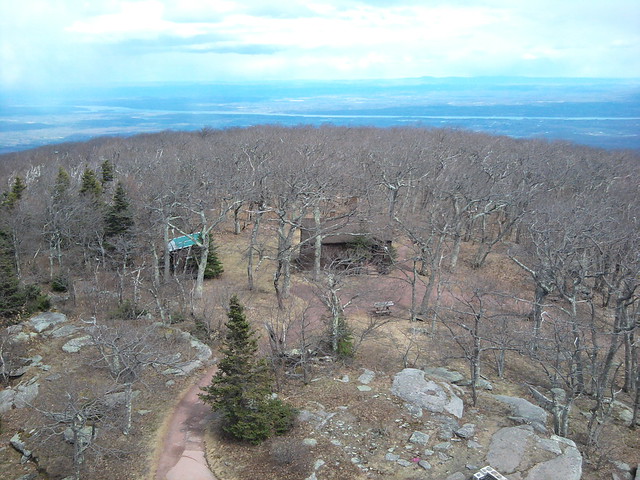
And Kevin manages to snag a phonecam shot to send to Mary Ann during the few moments in which he's able to get a signal. Alas, the signal fades before the message goes through, so she gets the picture a day later.
Overlook Mountain

The wind and sleet soon drive us off the tower.
Down from the tower

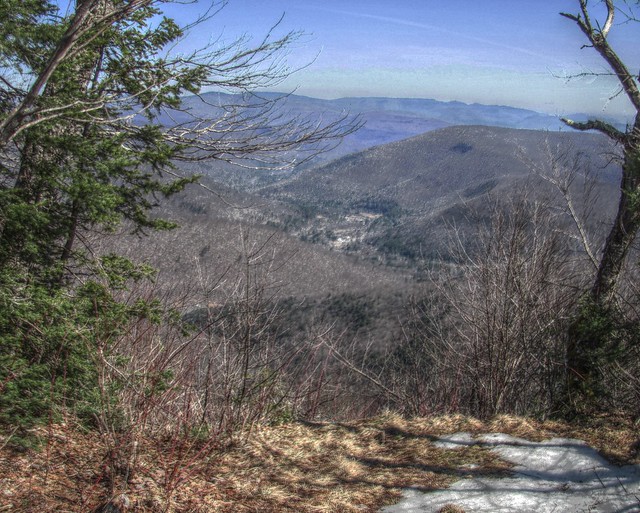
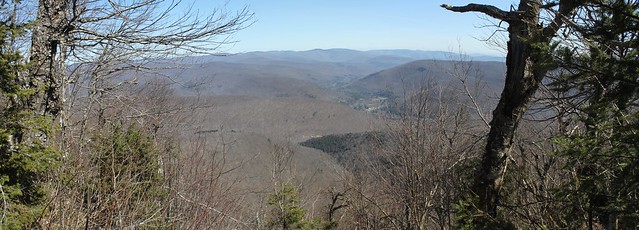
We take the more sheltered path to the sheer cliff on the east side of the mountain top. Even in the sleet, the cliff top offers spectacular views of the Hudson Valley and the Ashokan Reservoir. (Zooming view)

View from the Overlook Mtn ledge

Kevin grabs the obligatory "we made it" shot of Catherine.
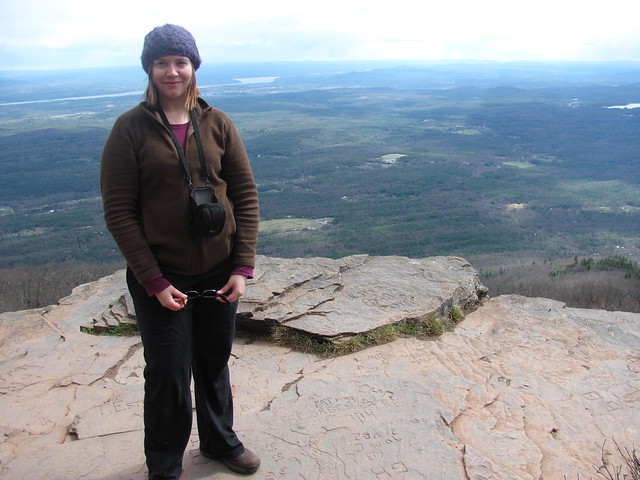
We made it

And Catherine waits patiently for Kevin to enter a GPS waypoint for the overlook.
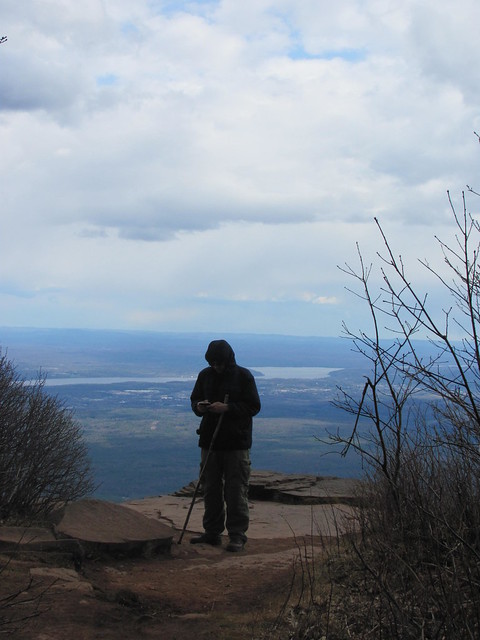
Kevin typing

Again, we manage to pull ourselves away from compulsive photography, hoist our packs, return to the Overlook Road (long unmaintained as a carriage road north of the mountain, but still usable as singletrack by mountain bikes), and hike north toward the Echo Lake trail junction. Before long, we're greeted by this little guy.
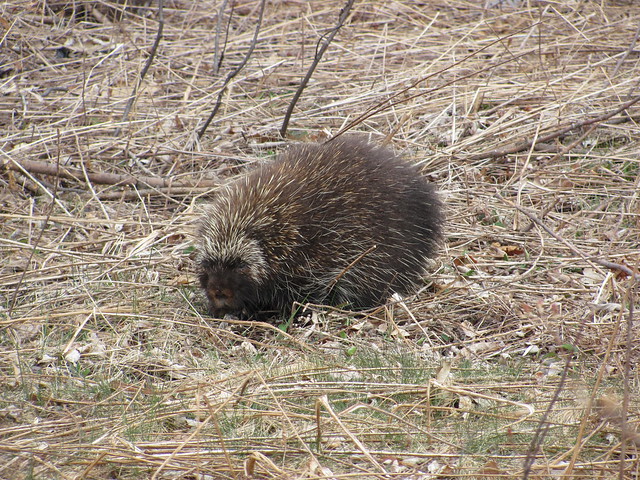
Porcupine

“Thank you for the photo-op, Your Porcupinity!” (Is that the correct form of address for a porcupine?) “Now, would you mind terribly if we were to use the trail here?” His (Her? How do you tell among all those quills?) Porcupinity graciously affords us a view of the other end of the creature:
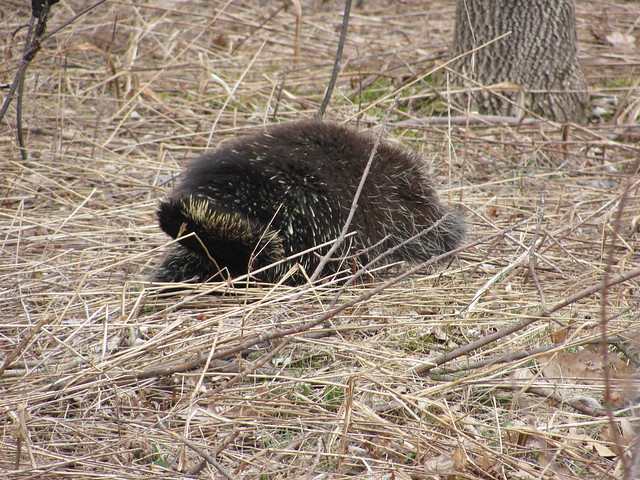
Porcupine

And we continue to the Echo Lake junction, where we turn and descend. (Our course isn't as drunken as the GPS track would indicate: the GPS signal was fading in and out because of the sleet.) Kevin doesn't spot the spring along the way (although the trail is wet at several points), and so leaves a question mark on his personal map. Before long, we catch our first glimpse of the lake through the trees.
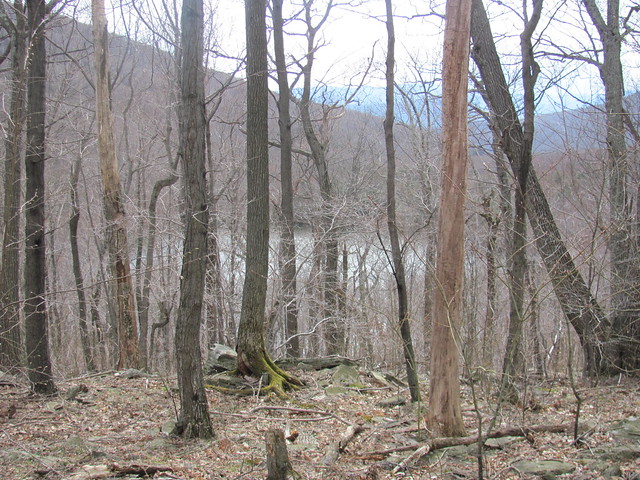
Echo Lake

By the time we arrive at the lean-to, the sleet has become pretty heavy. We decide to take time out and have afternoon tea, brewing up a nice cuppa over Kevin's alcohol stove. While we're sitting there enjoying our tea and energy bars, an enthusiastic Scottish terrier bounds up and starts nuzzling us, investigating our stuff, and generally acting amusing. A moment later, two young men appear. “Sorry! We didn't know anyone was in there! Rex![2] Leave those people alone!”

“Do you want the lean-to? We're not spending the night here, we just wanted to get out of the sleet and make a cup of tea. You're welcome to it, we're planning to tent anyway.”

“Yeah, we got caught in it up on the ridge! That was great! No, thanks, we're tenting, too! C'mon, Rex!”

By the time we've finished our tea, the squall has let up enough that we start walking along the lake, looking for the group of designated campsites that are supposed to be there. We run into the two young men again (Rex tries to follow us home, and one of the guys has to come and drag him back), but don't find a vacant spot. Finally, Kevin decides to just find someplace that's the required 150 feet (50 m) from water and trails. The first such place that's level enough to pitch a tent, he says to Catherine, “This spot looks perfect; it's lawful, and it's even flat, and, oh looky here, there's a CAMP HERE sign.”

We make camp, pump water from a nearby stream (Yuck, it tastes awfully tannic. Oh well, tannic water is generally safe), and go through the ritual of whirling and casting to get the bear bag line over a suitable tree limb. On one cast, the drawstring of the rock sack snags on the limb, and breaks as we're trying to haul back down for another try. Rock and sack are still in the tree. Kevin ties a monkey's fist arond another rock, and the very next cast is successful. So later we'll be able to hang all the food and toiletries.

Supper is mango chicken curry over rice and lentils. Kevin and Catherine both pronounce that recipe a winner. Instant chocolate pudding for dessert. Brush teeth, hang the bearbag, and it's time to crawl into the sack (we're going about by headlamp, and everyone knows that's “hikers' midnight”

Around about real midnight, Kevin and Cathy both need to visit the woods at nearly the same time. By now, the sleet has blown over, and the sky is so clear that we can actually navigate by starlight! (The Moon hasn't risen.) The beautiful weather continues for the rest of the trip.

Sometime in the wee hours, Kevin rolls over and hears the characteristic “huff whuff huff woof” of a black bear coming from the general direction of our bearbag. Reasoning that if the bear has got into our stuff, there's absolutely nothing we can do about it, he rolls over and goes back to sleep. In the morning, he asks Catherine, “Did you hear a bear in the night?”

“What does a bear sound like?” (Kevin tries to imitate the sound.) “Is that what that was? Thanks for not telling me then, I'd have been terrified!” The weather outside our tent is perfect. The bearbag is untouched (the Catskills don't have genius bears as the Adirondacks do), so breakfast of porridge, dried fruit and coffee is soon inside us. Pump more water (somehow Catherine draws sweet water out of the stream that was so tannic for Kevin), pack up, and head back up to the ridge.

While Catherine was waiting for Kevin to wake up and gather his wits, she also took a picture to show how gorgeous the campsite was. This sort of thing is why we go hiking.
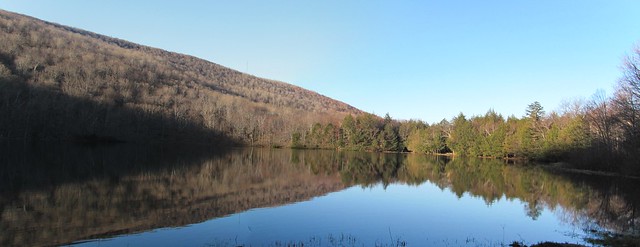
Echo Lake

On the way back up, we pass yet more evidence of the fury of Hurricane Irene, in the form of the root ball of a huge tree that she uprooted.
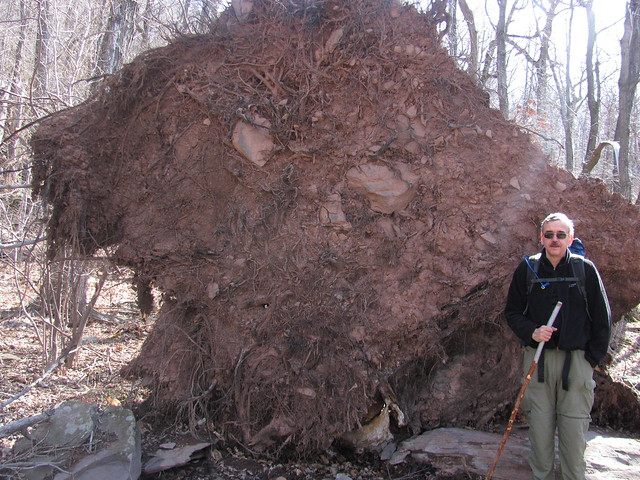
Blowdown

Heading north on the old Overlook Road again, we soon come upon the reliable Skunk Spring, where Kevin snags a GPS waypoint for his personal map. We have plenty of water, so don't bother to break out the filter and bucket.
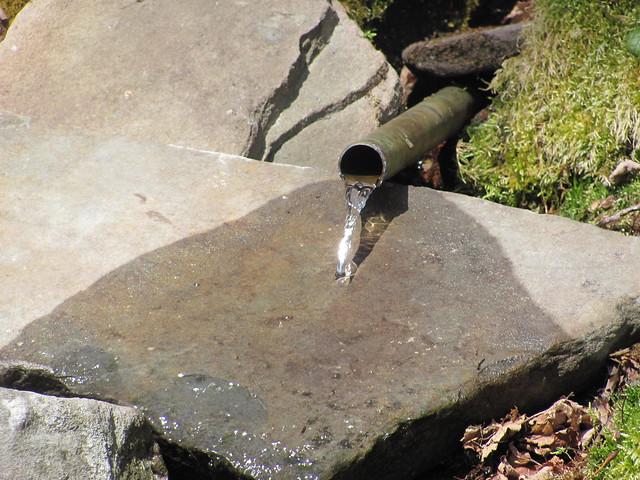
Skunk Spring

A short distance further along, we reach the abandoned bluestone quarry at an outcropping called Codfish Point. There are no codfish anywhere nearby; why is it called that? Apparently, the quarrymen ate sandwiches of canned codfish, and discarded the inedible bits in the quarry. Eventually, the quarry came to smell as you might expect. The quarry has been closed (and sweeter smelling) for over a century, but the name has stuck.

When we reach the quarry, we discover that the Quarry Gnomes have been busy preparing for our visit. We rest for a while on the throne of the Gnome King,
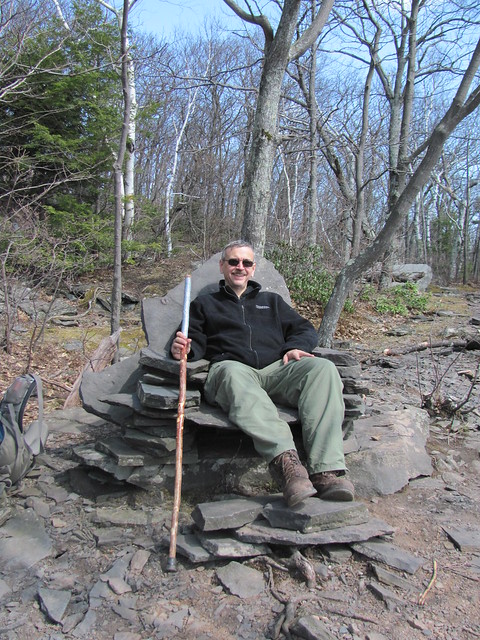
Throne of the Gnume King

preach to the wild creatures like Saint Francis,
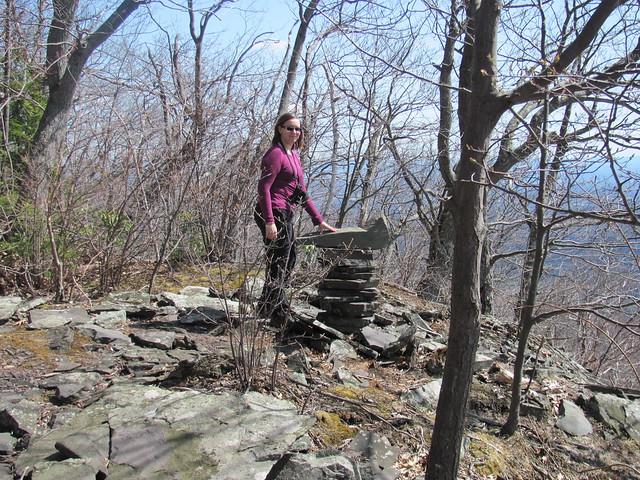
Catherine preaching to the flock

eat our lunch at a charming little conversational grouping overlooking the Hudson Valley,
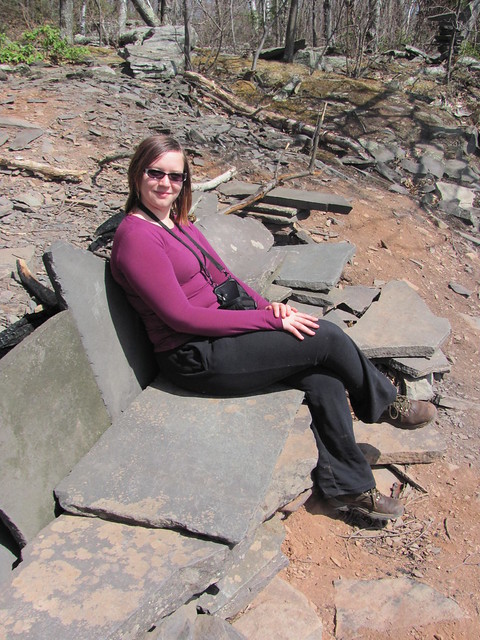
Gnomish sofaView of the Hudson Valley from Codfish Point

survey some gnome-sized benches around a gnome-sized firepit,
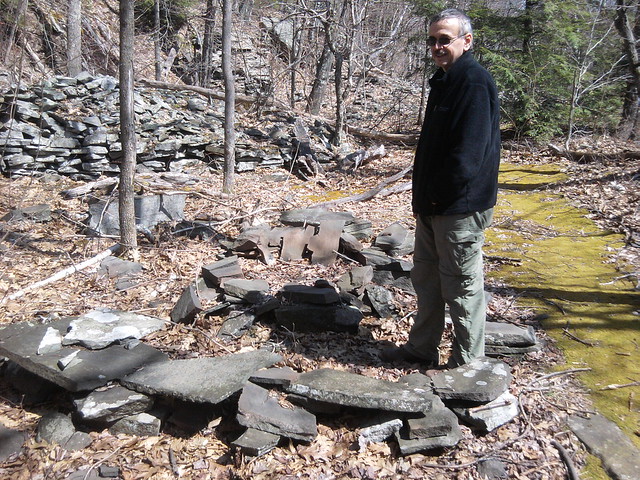
Gnomish fire circle

and try to fit Kevin's fundament into a gnome-sized chair.

Gnome chair

Back on the trail, we decide that we're going to limit our side excursions and not attempt anything ambitious, and head down toward the Platte Clove Nature Preserve and the way out. At the lower elevation, the ground has a lovely green carpet of Lycopodium..
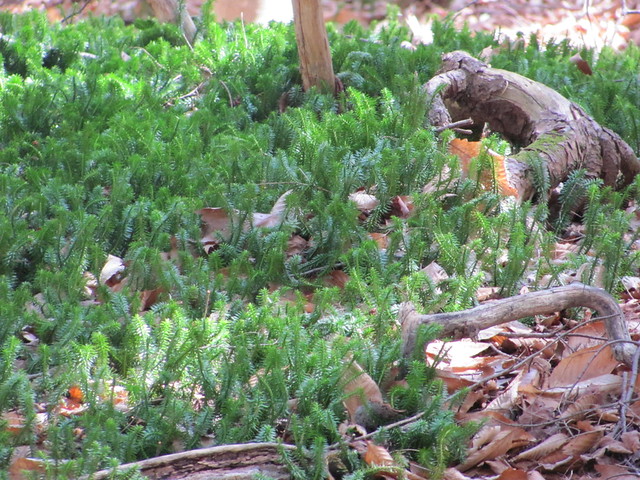
Lycopodium clavatum

On the way through the preserve, we run into two artistic ladies who are on a nature walk, sweaters around shoulders, tennis shoes, and so on. They treat us as if they're observing the local wildlife: “You've such big backpacks! Are you real campers? Did you actually spend the night in the woods?” “Yes, we made camp at Echo Lake, about five miles back.” “Wow, they told us there might be hikers traveling through here, but I never expected that we'd actually run into any!” Kevin and Catherine are able—barely—to stifle the giggles until the ladies are out of earshot.

The preserve has built a small-scale replica of the king-post bridge that once carried the wagons hauling bluestone out of the Catskill quarries to building sites all over the East Coast (and even farther, at times).
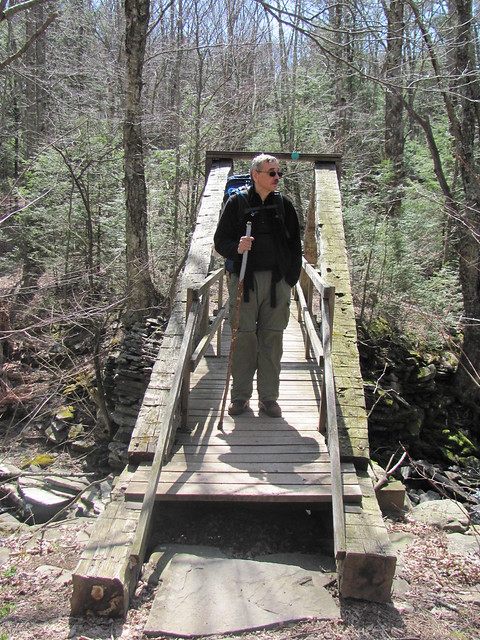
Kingpost bridge

One side trip that we can't resist is the climb down the gorge to the lovely Plattekill Falls. This waterfall is actually one of over a dozen spectacular falls in the Clove, but most of them have been seen only by climbers with technical gear—the Clove is one of the most inaccessible places in New York State.
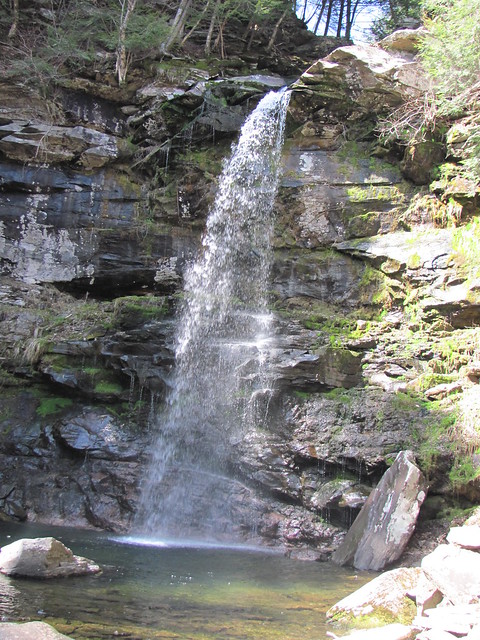
IMG_2233

So: What worked: Almost everything. The PCT bearbag hang foiled an actual Catskill bear. Meals were satisfying. Everyone stayed warm and dry, and both of us were comfortable with pack weight. The curry recipe is tasty. Wonderful scenery, some wildlife encounters, lots of history, on the whole a great trip!
What didn't work.Batteries. Kevin's phone ran out of juice a couple of hours before the end of the trip. And: We brought three sets of batteries for the camera. The two spare sets were both dead on arrival. Well, not quite dead, but low enough to trip the low-battery indicator of the camera after a couple of pictures. And yes, they were just-purchased, name-brand batteries.
Using a rock sack on the bear bag line. Rock sacks are for hikers that can't tie monkeys' fists.
Lessons learnt:Kevin has to be careful when cooking breakfast (and therefore undercaffeinated by definition). He caught his jacket sleeve on the handle of the cookpot (fortunately, still filled with cold water) and overset it on the lit stove! Fortunately, there was no real harm done. Catherine got all the food out of the way, we had plenty of water, and only the primer pan went out. The stove stayed lit, and boiled the replacement litre of water without complaint (and without refuelling).

[1] Yasinsac, Rob. “Hudson Valley Ruins: Overlook Mountain House” http://www.hudsonvalleyruins.org/yasinsac/overlook/overlook.html , downloaded 2012-04-15.

[2]Not the dog's real name, but I've forgotten the real name.


Read more...

Tuesday, March 20, 2012

Trip report: Balsam Mountain (Ulster County) 2012-03-17

Balsam Mountain

Saint Patrick's Day, and the last weekend of winter by the calendar: Kevin and Catherine decide to try for one more "winter" high peak in the Catskills. Alberto, a colleague of Kevin's from work, has been asking to come along on these outings, and so Kevin invites him as well.
The three get on the road about 0730, and hit the trail before 1000. (Everyone shakes their heads at the all-too-obvious evidence of Hurricane Irene's wrath in the Schoharie Valley: it will be years before things are rebuilt there.)

Trailhead

At 3610 feet, Balsam is one of the 35 Catskill 3500's. (And it's one that the club says has to be climbed in the winter.) It seems a little like cheating to claim a "winter" ascent in such wonderful weather, but all technicalities count.

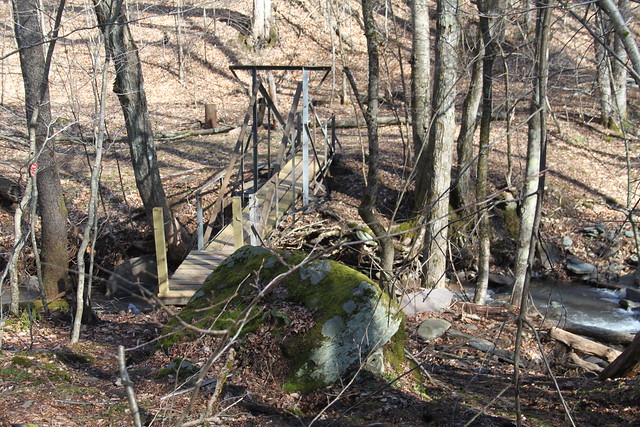
We start up from Rider Hollow to the west, climbing the Oliverea-Mapledale Trail. The trail has had the benefit of two newly rebuilt footbridges: one fellow hiker tells us that one of them went up in the last week.

Footbridge

Nevertheless, it has several extra stream crossings because of washouts. Catherine and Alberto rock-hop all of these confidently. Kevin, whose balance is considerably poorer, decides to put on Neoprene kayak shoes and wade across. (FSM bless wetsuit material, this process is comfortable even in fresh snowmelt.)

Washout

We find that the Rider Hollow lean-to is a pigsty, bring out a big plastic bag and trash it out. (Why, oh why, do so many hikers expect others to clean up after them?)

The trail conditions continue poor for some distance, as the streambank is badly eroded and there's a considerable amount of blowdown. At one point, we lose the trail entirely (we don't lose ourselves, because we know that the trail more-or-less follows the creek and we'll run into it again), and suddenly realize that it's some distance above us. We whack up the hill and rejoin it.

Lost the trail

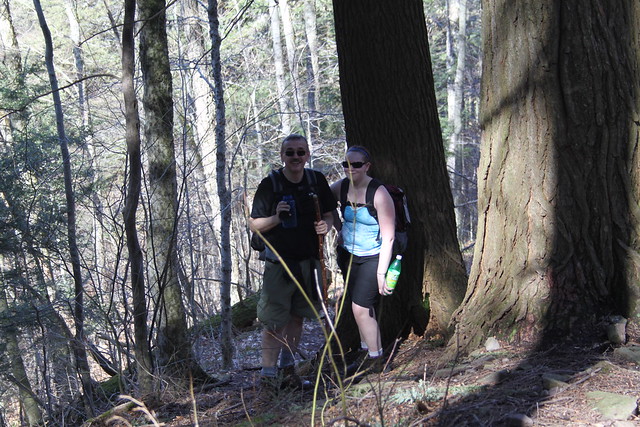
The trail ascends steeply all the way to the ridge between Balsam Mountain and Haynes Mountain. On the way, we pass some magnificent old-growth trees, including some majestic hemlocks that must be 3-4 centuries old - look at the diameter of that behemoth at far right!

Majestic hemlocks

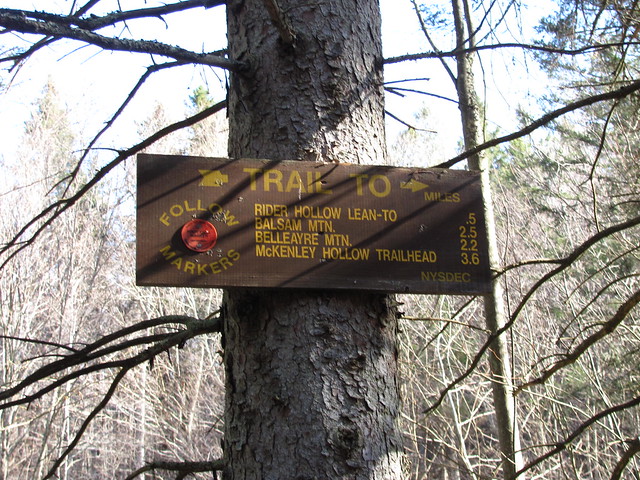
Turning left at the trail junction, we climb more gradually up the ridge past the 3500 foot marker.

3500 feet

Very shortly after it, the trail goes up a short ledge and steps into another world: the ash, beech and striped maple are suddenly replaced by balsam fir and scrubby gray birch. The abruptness of the transition never ceases to amaze.

Entering the subalpine zone

The Balsam Mountain summit lies only a few steps beyond, and we stop for the obligatory summit photos.

Alberto at the summitKevin and Cathy at the summit

The actual summit is almost viewless, but there's a nice overlook a short distance to the north, where the trail briefly crosses over from state wilderness into Nature Conservancy land. At this point, since we're descending on a north face, the trail starts getting icy. Catherine is able to rock-hop confidently - she's a native of a cold climate. She lends Alberto her microspikes, so Kevin and Alberto are able to be sure-footed. When we reach the overlook, we engage in compulsive photography and cook lunch.

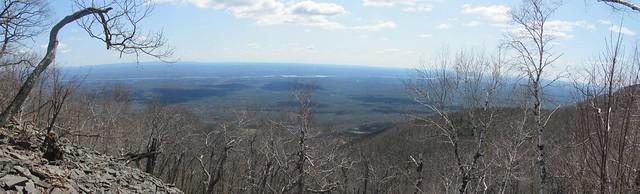
View from the overlook
Cooking lunch
Panorama from the overlook

After lunch, everyone's feeling strong, and we've still got a lot more daylight. We decide to make an attempt at a second Catskill high peak, Eagle Mountain, a couple of miles (and a couple of 500-foot or so elevation gains) to the south. We get as far as the viewless summit of Haynes Mountain (which stands 80 feet short of being a high peak in its own right) and descend to the col between Haynes and Eagle. When we get down there, the safety factors start running against us:
  • Alberto is having trouble with a boot. (Kevin would have helped with the burgeoning blister, had he heard sooner!)

  • The party is starting to tire.

  • The slope faces due north, and is icier than anything we've encountered all day. Cathy wants her spikes back if she's going to try it (and Alberto has no traction aids, wouldn't really have needed them on the hike we planned originally).

  • Haynes took longer than we thought, and if we summit Eagle, we'll be running out of daylight by the time we're back at the trailhead.

So we make the hard decision of leaving Eagle Mountain for another day, and turn back.

Descent is uneventful. We stop off at the spring on the west side of the pass to pump some more water - we're all running a bit short, and have an easier time following the trail down the hill (although there's still some steep scrambling to 'whack around the washouts!). Kevin even keeps his boots on.

Out to the trailhead, and on the road home with an hour of daylight to spare.

What worked: Kevin and Alberto seem to be reasonably well suited as hiking partners. One is a tortoise, the other is a snail, so neither is going to hold up the other.

Kahtoola microspikes were a wonderful invention. Crampons would have been overkill, but Kevin and Alberto needed something. (And they seemed to be the uniform of the day on the other hikers we met!)

Cathy was a trouper, hauling more than her share of random stuff (including rubbish from the lean-to).

The spirit stove burns hot, cooks fast. Its flames are invisible in daylight, so be careful. (Nobody got burnt!)

Turning back was 100% the right decision. Arrival is optional, safe return is mandatory.

What didn't work: Kevin's Android phone's GPS is still problematic, despite having got a kernel patch that ostensibly fixes that bug. Alberto's Droid kept the track well, even though Kevin's crashed a couple of times.

Freezer bag cooking in a Reflectix bag cozy is not a guaranteed process. The contents of the bag got rapidly dumped into the pot after it burst. (No more than a spoonful of food was lost.)

Lessons learnt: Alberto needs his own traction aids, and needs to duct-tape his heels before starting out - or at least at the first sign of a hot-spot.

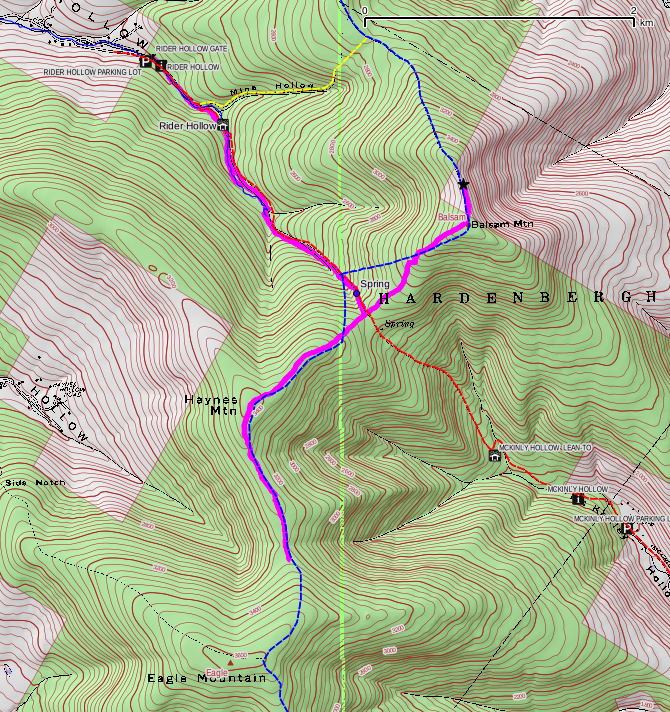
The electronic version of the DEC trail map lies. It misplaced the campsite above the Rider Hollow lean-to as being by the parking lot, it misplaced the lean-to itself as being up at the fork in the stream, and it placed the lookout directly on the north (false) summit of Balsam. And it misrouted the blue Pine Hill-West Branch trail - the magenta track in the map above shows us following the trail both directions. (Why would it take any route other than the ridge?)

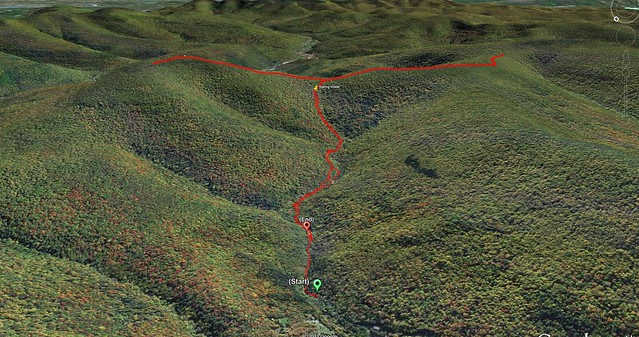
Google Earth visualization of the route:
Google Earth visualization of the track

Read more...

Saturday, January 21, 2012

Mapping New York - GPS and quality control

Last time, we loaded up a photograph of an old map of the Mohawk River State Park (the former Schenectady Museum Nature Preserve) and traced its borders to put them in our map. It turns out that I have multiple sources of data regarding this pretty parcel of undeveloped public land - including my own boots on the ground. In this installment, I'm going to have a look at superimposing them and comparing them.

The first additional data source is a set of GPS tracks that Andy Arthur obtained under Freedom of Information laws. These show the trail routings in New York state park lands, much as the DEC files do for the state forests. (I may at some point discuss the data quality of those files; they're available in several redundant formats, and the data do not match.)

The second additional data source is that I tried walking the trails about a month ago with a GPS receiver. Unfortunately, it was the GPS on my Android phone, which suffered an operating system crash partway through the walk. But I was able to recover my tracks for at least one of the trails, the blue trail (marked as 'purp' in the DEC files) that runs from the entrance by the Lock 7 parking up to the east power line near River Road.

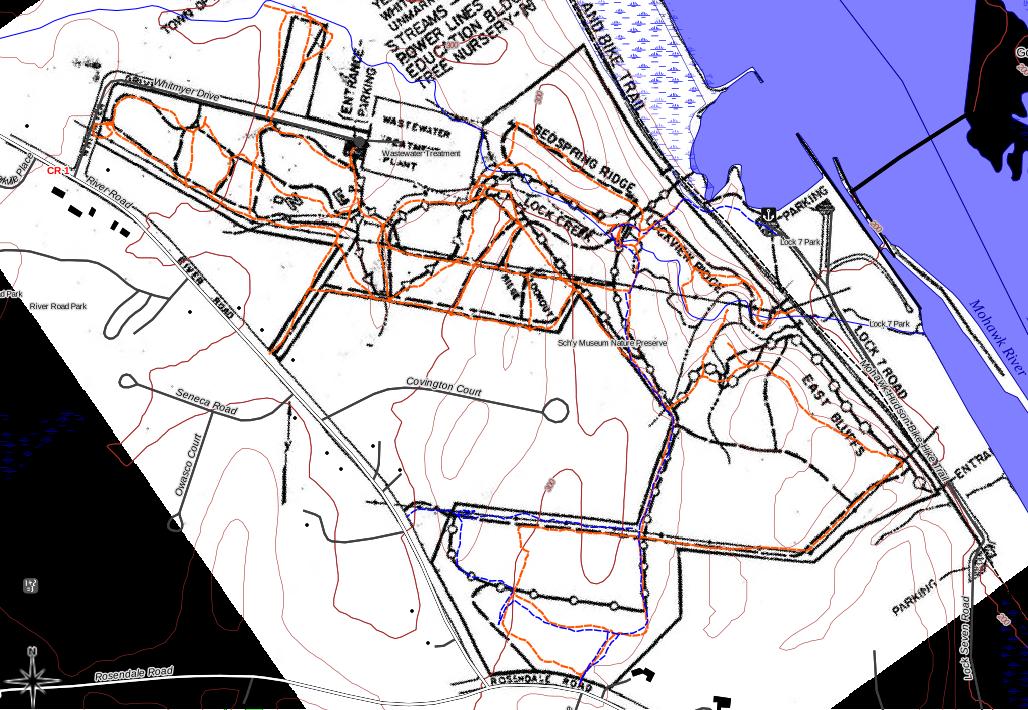
Mohawk River State Park trails
To compare what I found, I added vector layers with the KML file of the park (orange) and with the GPX file from my phone (blue). Looking at them superimposed in QGIS, I note the following.

  1. In the southern part of the preserve, the old trail map is largely schematic. I know from experience that the white trail follows the ridge top on the east bluffs and always has. The orange tracks match my memory, even if the phone had stopped recording.

  2. Similarly, the orange GPS tracks and my tracks (I *know* that I was following the blue blazes) largely align. on the blue trail, placing it a bit to the south of where the old map puts it.

  3. It also appears that whoever laid out the orange tracks missed a double blaze at one point and just bashed north to the power line. The blue blazes weren't hard to follow, and I have confidence in my track at that point.

  4. The orange tracks look a good bit better aligned with the map up at the north end near Whitmyer Drive. (There were better defined lanes through the old tree nursery, so this doesn't really surprise me.)


Conclusion: I have a lot of confidence in the park outline that I traced and in the alignment of the blue trail in my GPS tracks. I need more ground data for the rest of the trails before I'm willing to make my map available as something nearly definitive.

Before the snow gets too deep, I hope!

Read more...

Tuesday, January 17, 2012

Mapping New York - georeferencing an old map

Last time, I mentioned that the Mohawk River State Park (former Schenectady Museum Nature Preserve) is missing from my map - because it appears neither in OpenStreetMap nor in the New York State inventory of public lands. How can I get it included?

Fortunately, I found online that someone had snapped a photograph of an old copy of the map that had once been posted at the Whitmyer Road parking lot, and posted it to a mountain bike forum. The picture looks to be output from a CAD system, or perhaps an early GIS. In any case, it appears to have been done to scale, and have just enough points that we can reference it to the map. Let's give it a try.


Pull up ‘Plugins->Georeferencer->Georeferencer’ from the QGIS menu bar.
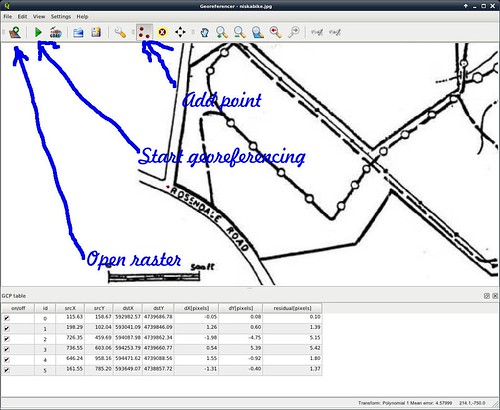
Georeferencing a map

Select the ‘Open Raster’ button in the toolbar, and load the ‘niskabike.jpg file that we downloaded from the mountain bike forum. Zoom in a couple of levels; you can use the ‘hand’ tool to pan around, just as you can with the map.

Now we have to identify corresponding points in the two maps. Click the ‘Add Point’ button in the toolbar, and click a point for which we can identify a corresponence. (I used the intersection of Whitmyer Drive and River Road as the first point.)
Adding a control point
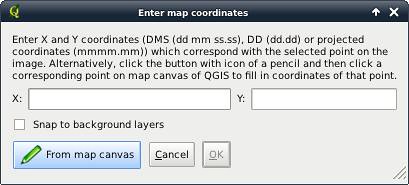
A dialog appears asking what corresponding point in the map to use. Click ‘From map canvas’ and select the point on the main map. The co-ordinates will be filled into the dialog box. Click ‘OK’

Continue this process for identifiable points that cover the map over a wide area. I used the turn of Whitmyer Road, the right angle in the upstream breakwater above the lock, the junction of the lock's retaining wall with the dam, the turn of Lock 7 Road near the parking area, and the junction of River Road and Rosendale Road.

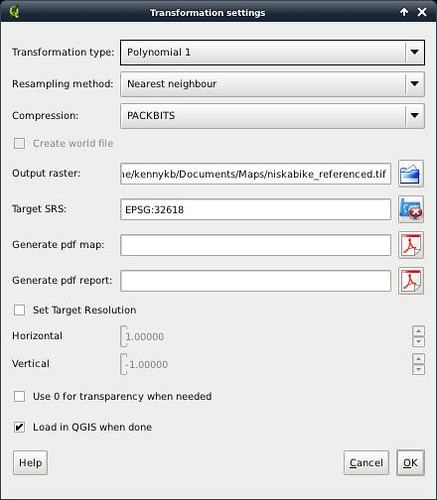
Once you have a data table of corresponding points, you can let the georeferencer do its job by selecting ‘Start georeferencing’ in the toolbar.
Transform settings for georeferencer
You will need to fill out the dialog that appears, at least giving it a TIFF file for the output, and a projection to use (which should usually be the projection of the main project). The rest of the choices should be filled out as shown.

Clicking ‘OK’, we get the old map loaded up as a layer in the QGIS project. Lowering this layer in the stack (I put it below the contour lines), we can see that it aligns nearly perfectly. The retaining wall of the lock, the roads, and the bike path all superimpose nicely. The stream appears to have meandered a little, but it's pretty soggy around there, and I'll say that it's good enough.
Georeferenced map

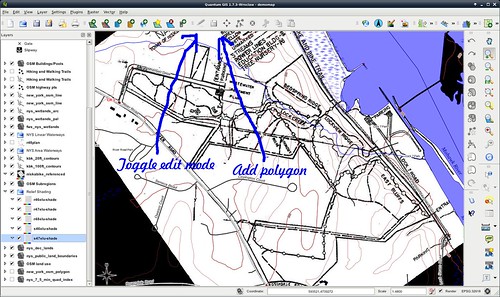
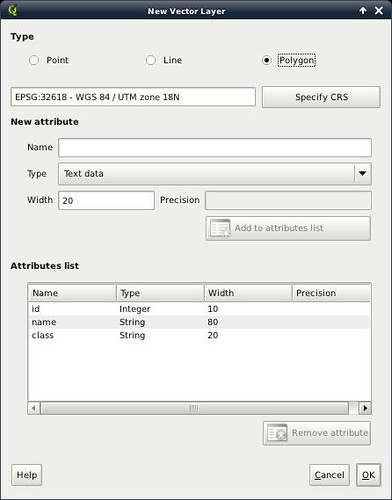
Now we can start transcribing data by tracing over the old map. Create a new shapefile layer, choosing a Polygon layer, and adding a few attributes.
Create a new layer
In the new layer, turn on edit mode (‘Toggle Editing’ in the toolbar). Create polygons that outline the land parcels of interest. Save the newly-created shapefile, and turn editing mode back off.

Lower the layer below the relief shading, style the land use appropriately, remove the temporary layer with the old map, and we're done.

(I could have transcribed the walking tracks, and so on, but I have other data sources for them. So read on to the next installment to see where that material is coming from.)

Read more...

Mapping New York - point data

We're just about done with the basemap. While we'll eventually augment it - we'll come back later to adding things like hiking tracks in the state forest lands - I'll skip them for now because they're irrelevant to my map of the Niskayuna nature preserves.

About all that remains is to add data about points of interest (and other single-point features).
All of the data that I'm adding at this step is already in the database from the ‘new_york.osm’ file. It's all in the 'point' table.

The OSM point data is, you should forgive the expression, all over the map in terms of what it describes. In order to get it to layer correctly with other things, I've broken it out into multiple layers in the QGIS project:

  • Highway points - those for which

    upper(geometrytype("way")) IN ('POINT','MULTIPOINT')
    AND "highway" IS NOT NULL
    AND "highway" NOT IN ('bus_stop', 'crossing', 'stop_sign', 'street_lamp,
    'traffic_signals', 'traffic_signals;motorway_junction',
    'unclassified', 'yield')

    These are things like roundabouts, turning circles, and freeway interchanges. They layer right next to the roads, and have a simpleminded style sheet. (The only thing of interest is that its symbols are sized in map units rather than millimetres - I represent a traffic circle by a circle of diameter 15 m at map scale.) Eventually, I want to do better labeling for numbered interchanges, but that can wait for a version of QGIS that has highway shields.

  • A mixed bag of features that includes schools, houses of worship, hospitals, public toilets, miscellaneous buildings, helipads, gates, and boat launches. (I expect this list to expand over time, depending on what is relevant to a given map. There are dozens of things that might be included.)

    upper(geometrytype("way")) IN ('POINT','MULTIPOINT')
    AND place IS NULL
    AND highway IS NULL
    AND (amenity IS NULL OR amenity NOT IN ('fire_hydrant'))

    This layer goes above the building footprints.

  • Place names (and names of dams, which are shown the same way). This layer is topmost in the stack. Its style displays nothing. It merely exists as a place for the labeling engine to add the names of objects.

    "place" IN ('city', 'hamlet', 'island', 'islet', 'locality', 'suburb',
    'town', 'unincorporated_area', 'village')
    OR "waterway" IN ('dam')


With all of this in place, the map appears quite informative - except that it's missing one of the preserves that I want to show! (The Mohawk River State Park, formerly the Schenectady Museum Nature Preserve.) In the next installment, I'll try to get that on the map.

In the meantime, here are the style sheets for the layers I discussed in this lesson:


Read more...

Monday, January 16, 2012

Mapping New York - shading the relief

Last time, we added polygons to our base map that describe land use and show building footprints. Now let's make the map prettier by giving it shaded relief.

Recall that when we were drawing the contour lines, that I mentioned that we should keep the Digital Elevation Model (DEM) files around. Now we'll be returning to them, and getting shaded relief for them.

To do that, we create the shading layers for individual quadrangles. (While this process is running, you probably want to uncheck 'Render' in the status bar; updating the screen with the results is expensive.)

Select ‘Raster->Analysis->DEM (Terrain Models)’ from the ‘Raster’ menu.
Generating shaded relief
(1) In the ‘Input File,’ browse to a DEM file for a quadrangle that you saved from the earlier step. In the ‘Output File,’ enter (or browse to) the path of a new TIFF file that will hold the relief shading.

(2) Select ‘Hillshade’ under ‘Mode.’ You can leave all the other options at their default settings.

(3) Select ‘Load into canvas when finished,’ and select ‘OK’

Repeat the process for any other quadrangles that you need to process, then select ‘Close’ to dismiss the dialog.

Now drag the new layers in the left-hand column of the screen to a position below the 'subregions' layer but above the 'land use' and 'public lands' layers.

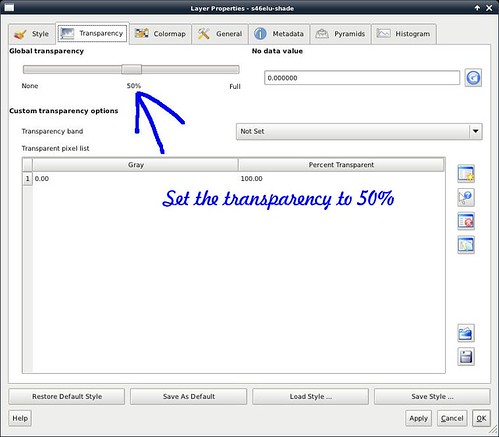
Right-click each of the new layers, and pull ‘Properties’ from the context menu.
Setting transparency
Go to the ‘Transparency’ tab, and change ‘Global Transparency’ to 50%.

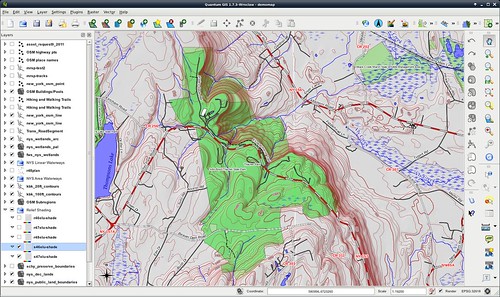
Turn 'Render' back on in the status bar, and admire your shaded-relief map.
Shaded relief

Next installment: Adding some point features.


Read more...

Mapping New York - more polygons

Last time, we got the map to a pretty decent topographic road map. (In a future installment, I may discuss curating the OpenStreetMap data; it has recurrent errors that come from the Census Bureau TIGER files. But that's a side issue.) The next thing that I want to get into place is some polygon data: "who owns this land? What's it used for? Does the public have right of access? Where are the landmark buildings?

The relevant part of the first set of questions can mostly be answered by a database of publicly-owned lands. This database is getting into territory where the public databases aren't quite up to snuff. Within the Adirondack and Catskill Blue Line, the data are readily available from NYSGIS. The usual drill of using ‘ogr2ogr’ loads them into PostGIS:

ogr2ogr -f PostgreSQL -overwrite -t_srs EPSG:32618 \
"PG:dbname=gis" DEC_Lands.shp \
-nln nys_dec_lands -nlt MULTIPOLYGON -lco PRECISION=NO

Once again, the ‘-t_srs’ option is there to reproject the data into the projection that I intend to use for the finished map, and the ‘-lco PRECISION=NO’ works around a bug that causes a failure in inserting some of the numeric data.

Outside the Blue Line, the data come from a different place: the New York State Office of Cybersecurity. (I'd be intrigued to know why they became the custodian of the data.) In any case, they have a collection of files available on the NYSGIS web site.

Rather than putting each of these files into a separate table in the database, and hence needing a separate layer to show them, I decided to integrate them into a single table, and add a column to the data representing which data set a given row came from. For this, I decided to resort to scripting. Pulling out my handy-dandy Tcl interpreter, I ran the following loadall.tcl script:

set firsttime true
# Find all the shapefiles in the working directory
foreach file [glob *.shp] {

# Extract the base name of each file, and create an 'ogr2ogr' command to load it
set base [file rootname [file tail $file]]
set cmd [list ogr2ogr -f "PostgreSQL"]
if {$firsttime} {
set firsttime false
lappend cmd -overwrite
} else {
lappend cmd -append
}
# Add a 'data_source' column to identify which file we loaded
lappend cmd -sql "SELECT *, '$base' AS data_source FROM $base" \
-t_srs EPSG:32618 \
-skipfailures \
"PG:dbname=gis" \
$file \
-nln nys_public_land_boundaries \
-nlt MULTIPOLYGON \
-lco PRECISION=NO
# Report on the console which file we're processing, and load it
puts $cmd
exec {*}$cmd >@stdout 2>@stderr
}

With these boundaries, what I mostly care about is “recreational” (go ahead and access) versus “nonrecreational” (permission needed, or special land use such as prisons and schools). (And I also want to treat the ‘AdirondackCatskill’ file specially, because that's the Blue Line, rather than reflecting public ownership.

Both of these layers need some styling. Rather than walk through that whole process, I have QML files attached at the end of the post.

Dealing with OpenStreetMap polygon data is rather more complicated, because it's got so many different things in the same file. I therefore made several different layers, with SQL queries to extract specific features.

(1) The first layer, I just left with the name, new_york_osm_polygon. This layer really represents "here are polygons that I don't know what to do with, yet." It is stacked behind everything else, and I usually leave it unchecked unless I'm actively working on styling for polygons. Its query looks like:

admin_level IS NULL
AND ("boundary" IS NULL OR "boundary" NOT IN ('national_park'))
AND ("waterway" IS NULL OR "waterway" IN ('boatyard','dam','dock','rapids','waterfall'))
AND ("natural" IS NULL OR "natural" NOT IN ('bay', 'marsh', 'pond', 'swamp', 'water','waterway','wetland'))

This query excludes:

  • Anything with an ‘admin_level’ attribute: these are administrative regions (states, counties, cities, towns, etc.)

  • National park boundaries. I have these more accurately in the NYS Public Lands file.

  • All waterways, other than man-made assets on the water.

  • All wetlands, I've taken care of those already.


I style this letter either in bright yellow or icky purple, just to call attention to the unclassified features.

(2) The next layer is the layer where I describe land use. Its SQL query looks like:

"landuse" IS NOT NULL
OR ("leisure" IS NOT NULL AND "leisure" NOT IN ('ice_rink','pitch', 'track', 'tennis_court'))
OR "aeroway" IS NOT NULL
OR (amenity IN ('school', 'college', 'university', 'hospital') AND building IS NULL)

which translates to:

  • Land use polygons

  • Polygons marked 'leisure', except for a handful that usually appear inside parks and want to be rendered at a higher level.

  • Polygons marked 'aeroway'.

  • Polygons marked 'school', 'college', 'university', or 'hospital', except for buildings (these allow highlighting of campuses).


This set may need to be considered a work in progress; I expect these rules will need to be tweaked depending on the theme of the map.

For this layer, I created a fairly complex style with rules that fill the polygons in different colors according to land use. The QML is attached.

(3) Next up are the 'public lands' and 'DEC lands' layers, which I already discussed.

(4) Next, I have a few more types of region from OpenStreetMap. I call the layer OSM Subregion, and its query looks like:

(amenity IN ('parking')
OR leisure IN ('Dog Run', 'pitch' ,'tennis court','track'))
OR aeroway IN ('apron')
AND building IS NULL

so that it includes parking lots, dog runs, playing fields, tennis courts, racetracks, and airport aprons. What these types of object have in common is that they are usually layered atop another object (a shopping mall, industrial facility, park, airport, etc.), and so they look better rendered in an upper layer. Once again, I've attached a QML file to style them. This layer goes above the 'public lands' layers, but below the contour lines.

(5) Finally, there are polygons for a few man-made features:

building IS NOT NULL
OR leisure IN ('pool','swimmin_pool','swimming_pool','wading_pool')

that is to say, buildings and swimming pools. This layer goes very high in the stack - above the roads. It provides footprints for these structures. Once again, I've attached the QML that styles it.

Wow, that's a lot of layers from one data set. But with them all in place, our map now has quite a lot of detail.
Added polygon data to the basemap
Next time, we'll make the map prettier, by adding shaded relief.

Attachments:


Read more...